How to Grow Wheatgrass
Authored by Leah Chester-Davis
In addition to smoothies, wheatgrass juice is used in soups and dressings. Wheatgrass clippings can be tossed in salads. In powder form, it can be added to recipes from soups and sauces to granola, pizza crusts, bread dough, and other baked goods.
Wheatgrass typically refers to the young blades of the wheat plant, the same plant that is grown for breads and cereals. Rather than large fields teeming with long stalks of golden wheat, which may be your first thought, wheatgrass is different. It does not require a large field to grow it. Rather, it is usually grown indoors and harvested when young and green, usually seven to 10 days (about 1 and a half weeks) old, and about 7 to 9 inches long. The green shoots are then added to a special juicer to extract the green juice.
It is that green juice, in small quantities, that is touted for its health properties. Wheatgrass can also be dried into a powder form. It is a rich source of chlorophyll, fiber, and many minerals and vitamins, including vitamins A, C, E, and iron, calcium, magnesium, and amino acids. It is said to help improve overall health, stabilize blood sugar, boost your immune system, reduce inflammation, and improve digestion. Wheatgrass juice has a strong flavor, so some health food stores, and health drink companies add wheatgrass to smoothies and other drinks to make it more palatable.
Some people grow wheatgrass for their pets and backyard chickens to nibble on. Both cats and dogs nibble on grasses, and so do many other animals. Wheatgrass is said to contribute to overall health and improve skin conditions. Ask your veterinarian if wheatgrass might be beneficial for your pet.
This guide focuses on growing wheatgrass, and we also supply a word of caution. While wheatgrass is touted as having many health properties, talk with your doctor before adding any new regimen to your diet.
About wheatgrass
| Botanical name: | Triticum aestivum |
| Common name: | Wheatgrass |
| Plant type: | Grain grass |
| Size: | 7 to 10 inches |
| Sun exposure: | Indirect light |
| Soil type: | Potting mix in containers or loose friable soil in ground |
| Soil pH: | 6.8 to 7 |
| Hardiness zones: | Indoors year-round; outdoors spring and fall in zones 3 to 10 |
| Average first frost: | Varies by region |
| Average last frost: | Varies by region |
| Container friendly: | Yes |
| Beginner friendly: | Yes |
Growing
Wheatgrass can be grown just about anywhere, even with limited space: a kitchen, apartment balcony, garage, porch, or greenhouse. It needs indirect sunlight and the temperature needs to be warm enough so that the wheatberries will sprout, 65 to 75 degrees F.
Look for organic, hard, red winter wheat seeds, which will be a deep golden color. If buying from a garden center or wheat grower that may have many types of wheat, specify that you are planting for wheatgrass consumption. Avoid non-organic seeds, which typically are treated with chemicals or synthetic fertilizers.
Store wheatgrass seeds in a cool, dark, dry place with low humidity. Seeds will keep about two years. Seeds can also be stored in the refrigerator or freezer. If you wish to have fresh wheatgrass on a regular basis, stagger your planting dates to have a continuous supply.
One 10- x 10-inch tray will produce enough grass clippings to extract about 8 ounces of juice or about 1 ounce per day for a week.
If you wish to have fresh wheatgrass on a regular basis, stagger your planting dates to have a continuous supply.
Planting
Before starting, gather supplies. The amount needed will depend on how much you want to produce. You will need:
- Wheatgrass seeds, about 1 cup per 10 x 10 tray; sometimes the seeds are referred to as wheatberries
- Flat trays, about 10 x 10 inches or 10 x 20 inches are commonly available but any flat tray will work
- Jars to soak seeds before planting; a Mason jar works well
- Cheesecloth
- A table or shelves near a window for indirect light
- Good quality soil.
Most items are available at your local garden center or you may already have some available at home. Some garden centers and health food stores sell wheatgrass growing kits, which may be a good choice for first timers.
Start with a good quality potting soil or mix your own with a combination of 40 percent topsoil, 50 percent compost, and 10 percent peat moss. If using a mix, select an organic mix that includes perlite or vermiculite. Do not use mixes that have bark or wood chips that are not decomposed. Any compost needs to have a loose, granular texture.
Wheatgrass can be planted directly into the ground in well-worked, friable soil. Cover with a 1-inch layer of soil. If planting outdoors, do so in the spring or fall during cooler temperatures. Protect it from insects, pets, and the weather, particularly if you are planting it for consumption.
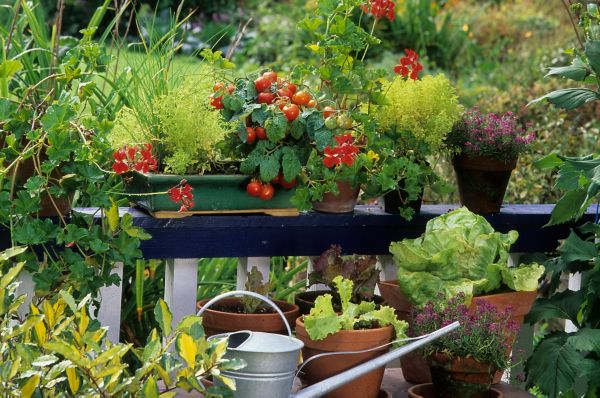
Wheatgrass is also popular for ornamental purposes, planted in baskets or decorative containers. Outdoors it is an ornamental grass in the landscape.
How to start wheatgrass at home
Step 1
Wash the seeds and remove any debris.
Step 2
Soak the seeds to soften and facilitate sprouting.
In a quart Mason jar, place 1 cup of seeds and cover with about 2 cups water. This will be enough for a 10 x 10 tray. Allow the seeds to soak about 8 hours. They will expand as they soak up water. If you are in a hot climate, place the jar in the refrigerator to allow the seeds to soak.
Step 3
Rinse the seeds and drain.
After the 8-hour period, rinse the seeds in the jar and then drain. Place cheesecloth over the opening of the jar and secure with rubber bands. Position the jar so that it is tipped at an angle to allow it to drain. A dark space is best because the seeds are now going into the germination period. Over a period of two days, you will need to rinse the seeds twice daily, each time allowing the water to drain from the jar.
While the seeds are germinating, spread a 1- to 2-inch layer of soil evenly in your tray to prepare for the next step.
Step 4
Spread the sprouted seeds evenly across the soil.
Place the drained seeds as evenly as possible without them being piled atop each other.
Step 5
Water the soil and cover tray.
Use a spray bottle to moisten the soil. Do not waterlog it. Cover the tray with another tray turned upside down. Check moisture levels daily. Use the spray bottle as needed to moisten the soil.
Step 6
After three days, remove the top tray.
At this point, seedlings should be about 2 inches tall. Lightly water them and move them to indirect light. They will be pale yellow or white but will begin to turn green as they are exposed to light. If you wish to grow them outdoors, this is the stage to move them to a porch, patio, or greenhouse. Monitor light levels. More than 10 hours of indirect light is favorable but direct light can be too harsh. Your trays will also need to be protected from heavy rainfall, pets, or other animals. Check soil to determine if watering is needed daily.
In about six to 10 days (about 1 and a half weeks), the wheatgrass should be about 7 to 10 inches tall and ready to harvest.
In about six to 10 days (about 1 and a half weeks), the wheatgrass should be about 7 to 10 inches tall and ready to harvest.
Fertilizing
- When using a good quality soil mix, you do not need to fertilize.
- If growing hydroponically, some growers add powdered kelp to the water.
Controlling Pests, Diseases, and Other Problems
- Mold can be the worst problem, and it can attract fruit flies. Do not overwater plants. Keep humidity levels between 40 and 60 percent in a room temperature around 70 to 75 degrees F. Good air circulation is important so it may be helpful to run a fan nearby.
Harvesting and Storing
At the harvest stage, it may look like the leaf blade is splitting into two pieces. When it has this appearance, it needs to be harvested immediately. This is known as the jointing phase, just before it begins its maturing stage and directs its energy to developing grain. Wheatgrass blades should be a rich, vibrant, green color and they should be standing upright.
Use a clean pair of kitchen scissors or a long, sharp knife. Hold the leaf blades and cut as close to the soil as possible. It is best to harvest the entire tray at the same time. After harvest, discard or compost the wheatgrass mat.
Storing
After harvesting, juice immediately or store grass in the refrigerator. Store in glass or hard plastic containers that allow for air circulation. Plastic bags are not recommended. Grass can be stored up to two weeks. If it turns yellow, discard it.
For best nutrient retention, juice the grass soon after harvest. It can be frozen for future use. Store the juice in glass or plastic containers, leaving some air space. When frozen, it will last about a year.
A special juicer may be needed; many juicers and blenders will not adequately extract the juice.
A special juicer may be needed; many juicers and blenders will not adequately extract the juice.
Expert Tips
- Despite its nutritional qualities, it is best to check with your doctor before beginning a wheatgrass diet.
- Some growers add a little baking soda to the water in step 3 when rinsing the seeds to help reduce chances of mold. Clean your growing tray with a disinfectant such as diluted bleach or hydrogen peroxide after use.
Frequently asked questions
How can I be sure my wheatgrass has enough water?
Misting the planting tray in the morning and in the evening should keep the soil moist. If the leaf blades are wilted or pale, they need water. Another way to check is by lifting a corner of the wheatgrass from the tray. The roots should be damp.
What is the white, cottony stuff on my wheatgrass?
This sounds like mold, which can also look like grayish fuzz or brown roots. It typically is the result of overwatering. Discard the plants if the mold is in the grass blades.
Why is the juice I extract from my wheatgrass bitter?
Mold can cause it to be bitter. Harvesting too late is another reason. Wheatgrass needs to be harvested just as the blades split, which is called jointing. Acidic soil may be another reason. Wheatgrass should taste sweet not bitter.
