How to Grow Brussels Sprouts
Authored by Leah Chester-Davis
Brussels sprouts are a cool-season crop that provide one of the more interesting-looking vegetables in the garden. They look like tiny cabbages and grow along a tall, upright stalk that is hidden by large bold leaves.
Brussels sprouts are in the same family as other Cole crops such as cabbage, broccoli, cauliflower, kale, and collards. They contain vitamins C and K with some of the B vitamins, minerals, and dietary fiber. This vegetable, which gets its name from Brussels, Belgium, has become much more popular in recent years. If you bypass boiling the heck out of them, which can cause them to be bitter, and instead roast them or rough chop or shave them and sauté with olive oil and a few slices of chopped up pancetta or bacon, they may become a favorite side dish. Brussels sprouts and other Cole crops are a great way to extend your growing season in early spring and in the fall and into winter.
About Brussels sprouts
| Botanical name: | Brassica oleracea var. gemmifera |
| Common name: | Brussels Sprouts |
| Plant type: | Biennial because it requires two growing seasons; treated as an annual |
| Size: | 2- to 3-feet tall |
| Sun exposure: | Full sun, at least 6 to 8 hours each day |
| Soil type: | Well-drained, moist, rich with organic matter |
| Soil pH: | 6 to 7 |
| Hardiness zones: | 2-11 |
| Days of maturity: | 80 to 100 from transplant |
| Average first frost: | Varies by region |
| Average last frost: | Varies by region |
| Container friendly: | Yes |
| Beginner friendly: | Yes |
Growing
Brussels sprouts like cool weather. It not only helps the plant form tight, compact heads, it will also help enhance its flavors, making them sweeter and milder. Warm temperatures can cause them to become strong flavored and bitter and may result in loosely formed heads. The best time to grow is in the fall or in the very early spring. In more temperate climates, this plant can overwinter. While Brussels sprouts grow best in cooler climates, they can be grown in warmer regions such as the South, though they do not like hot summers, and cool weather in the spring and fall may not be long enough for the best yields. Look for heat-resistant varieties.
The best time to grow is in the fall or in the very early spring.
Planting
For many areas of the country, this vegetable will do best as a fall crop, when small transplants are planted in mid-summer or about 90 to 100 days before the first frost date in your region but they can be grown in the spring. If you are in a northern climate, spring may be optimal. Due to differences in regions, check with your local Extension office or local garden center for best planting times in your area.
While it can be seeded directly into the garden, transplants are the most common way to give this vegetable a good start.
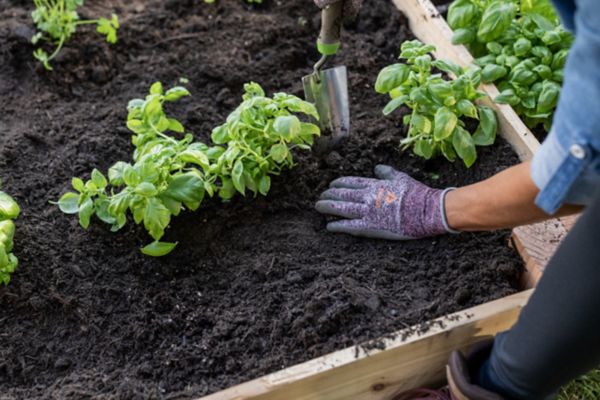
Plant in well-drained soil that is rich with organic material. The pH should be in the 6 to 7 range and able to retain moisture. Dig holes, add the transplant, and fill the soil around it so the plant is at the same level it was in its pot.
Space them about 18- to 24-inches apart in rows that are spaced at least 24- to 30- inches apart. They will need plenty of room as the plant puts on a thick layer of foliage and grows to a height of about 2- to 3-feet tall. As the plant grows, the sprouts will develop along leaf axils of the stalk. As lower leaves begin to turn yellow, break them off from the stalk, but leave the upper leaves.
If growing in containers or grow bags, use a good quality potting mix for vegetables. Select a container that is about five gallons in size, about 12 inches deep and 12 inches in diameter.
Brussels sprouts need to be watered, particularly when late summer and early fall temperatures remain warm. They do best in soil that is kept slightly moist. When watering, use drip irrigation or soaker hoses or apply water at the base of the plant. They will need at least an inch of water each week.
Apply mulch around the plant to help conserve moisture levels and keep them even, and to reduce weeds.
Fertilizing
Brussels sprouts are heavy feeders, meaning they need nutrients. If you plant them in soil that contains a high amount of organic material, you will have a head start on providing them with needed nutrients.
If you have had your soil tested, follow recommendations for soil amendments. In the absence of a soil test, Arkansas Extension recommends fertilizing when transplanting. Use 8 ounces per plant of a starter fertilizer solution (1 tablespoon of 20-20-20 soluble fertilizer per gallon of water). When the plant grows to about 12-inches tall, side-dress with an application of 10-20-10 or 13-13-13 fertilizer. Side-dress means to apply fertilizer around the base of the plant without touching the stem or stalk. Apply again every three to four weeks.
If growing organically, select an organic amendment from your garden center and follow label directions.
Cease fertilizing when sprouts begin to form.
Controlling Pests, Diseases, and Other Problems
Providing your plants with the best growing conditions such as healthy soil and even moisture levels will help reduce insects and diseases but sometimes our best efforts are challenged.
Aphids, cabbage worms, loopers, and diamondback worms can feed on the leaves. The adult moths lay their eggs on the leaves. Small black beetles known as flea beetles feed on seedlings. Insecticidal soaps may be needed or an organic product such Bacillus thuringiensis (Bt).
Black rot, blackleg, Fusarium wilt, downy mildew and Alternaria are diseases most common to this plant. When you first spot problems on foliage, remove the foliage and discard away from the garden. Do not add them to your compost pile. If problems persist, consider a fungicidal treatment. Follow label directions. Keeping the foliage dry will help reduce disease problems.
Harvesting and Storing
When the plants reach about 2-feet or more and sprouts are about 1-inch, remove about three inches from the top portion or the growing point of the plant. Leaves have a similar flavor to kale and can be chopped up and lightly sautéed. Removing the top portion of the plant directs the plant’s energy into developing the sprouts. Some gardeners also remove six to eight of the lower leaves as the sprouts develop.
Brussels sprouts will benefit from a light frost, which seems to enhance their flavor, so there is no need to rush to harvest this vegetable when frost threatens. After a frost and when the sprouts are about 1- to 1 1/2-inch in diameter, it is time to harvest. They should be hard, compact, and deep green. The lower sprouts mature first. Simply twist, snap, or cut them off the stalk. Sprouts at the top of the stalk will continue to mature through the season. If the sprouts along the entire stalk seem mature, cut the entire stalk at the base of the plant, and then remove the sprouts. Harvest the sprouts before the leaves turn yellow.
If you are in a region that turns cold, with temperatures in the mid-twenties, Minnesota Extension recommends removing the leaves, cutting the plants off at the soil surface, and stacking or hanging the stalks upright in a cool room such as a garage or basement. Harvest sprouts from the plants over the next few weeks.
Brussels sprouts can be stored in the refrigerator for a couple of months. They also can be blanched and frozen.
Expert Tips
- Prepare soil with plenty of organic material in a sunny spot. Use soil test recommendations to amend the soil as needed. In the absence of a soil test add a 10-20-10 or 13-13-13 when plants are about 1-foot tall, and every three weeks after, up until sprouts begin to form or use an organic amendment from your garden center. Follow label directions.
- Space plants at least 12- to 18-inches apart, giving them plenty of room to grow with good air circulation.
- Plant three to five plants per person for fresh use, and more if you are planning to freeze or can.
- Keep moisture levels even and do not allow the soil to become too dry, which may affect calcium uptake by the plant.
- Regions of the country vary regarding best planting times and cultivars. Check with your county Extension office or local garden center for best guidelines for your area. Generally, they like daytime temperatures around 65 degrees F.
Frequently asked questions
Why do my sprouts have only loose leaves and do not develop firm heads?
It may be due to hot weather, which often prevents sprouts from forming compact heads. This can happen more often with spring seeding that does not give sprouts enough time to develop before warm weather, and it can also happen when the temperatures in the fall stay warm. In very early spring, use transplants for a better chance of success.
What do I do about the black, round spots on the plants’ leaves?
This may be Alternaria leaf spot, which can cause damping off seedlings or black, round spots. Remove diseased leaves and plants from your garden. Apply a fungicide if the problem persists.
Why are the inside of my plants brown?
This may be due to tip burn, which is caused by a calcium deficiency. This can be caused by low calcium levels in your soil or your plants inability to update the nutrient from the soil. Make sure you keep soil moisture levels even. Amend your soil as needed per soil test recommendations.
