How to Grow Potatoes
Authored by Leah Chester-Davis
A potato, which is a diet staple around the world, is easy to grow.
No matter how you enjoy them – fried, baked, roasted, steamed, boiled, grilled -- potatoes are a favorite vegetable. This vegetable, which is a diet staple around the world, is easy to grow. Growing your own is also a chance to try types and varieties that may not be available in your local grocery store. They range from russet potatoes to red, white, yellow, purple, and fingerling types. They contain complex carbohydrates, potassium, vitamin C and small amounts of other vitamins and minerals.
About potato
| Botanical name: | Solanum tuberosum |
| Common name: | Potato |
| Plant type: | Half-hardy annual |
| Size: | Varies depending on type, variety |
| Sun exposure: | Full sun |
| Soil type: | Well-drained soil |
| Soil pH: | 5.3 to 6.5 |
| Hardiness zones: | 3-10 |
| Average first frost: | Varies by region |
| Average last frost: | Varies by region |
| Container friendly: | Yes |
| Beginner friendly: | Yes; this is a particularly fun vegetable for children to grow |
Growing
Potatoes are tubers, which are short, fleshy stems that grow underground. That’s why good quality soil will result in better formed and healthier potatoes.
- Potatoes prefer full sun.
- They like fertile, well-drained soil that is slightly acidic, around 5.3 to 6.5. If possible, get your soil tested before planting and follow recommendations for any soil improvements. If your planting bed has plenty of composted organic material, it will give you a head start for a successful garden.
- As a guide to what to plant, consider your favorite way of preparing them. Red varieties are excellent for boiling or roasting. White-skinned varieties can be boiled, roasted, or fried. Russet potatoes are excellent for baking, roasting, and for French fries. Fingerling potatoes are delicious lightly boiled or steamed.
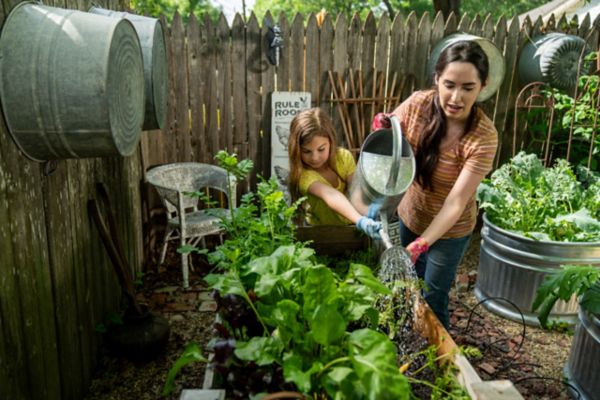
Potatoes are a particularly fun vegetable for children to grow.
Planting
Potatoes get their start from what is called “seed potatoes,” potatoes that are grown specifically to get plants started. Certified seed potatoes, which should be firm and unsprouted, can be purchased from local garden centers or seed sellers. It’s not recommended to use potatoes from the grocery store as seed potatoes. Many have been treated to prevent sprouting. If they do sprout, they may produce smaller potatoes and yields.
- In many regions of the country, potatoes are a cool-season crop and do best when planted in late winter to very early spring. Depending on your area, planting times may be two to four weeks before your last frost date when the soil is dry and can be worked. They also can be planted in July to August for fall production.
- Potatoes can be planted in garden rows, raised beds, and even in containers for those who have limited space or want to try an easier way to harvest this popular vegetable.
- Before planting, about 24- to 48-hours in advance, prepare seed potatoes. If smaller than about two inches in diameter, the entire seed potato can be planted. If you have larger seed potatoes, cut them into pieces, with each piece having one to two eyes, which are the dimpled areas of the potatoes where they sprout. After cutting, allow the pieces to dry for a day or two in a cool location. This will help reduce chances of rotting.
- Days to maturity is 70 to 120 days, depending on the variety and cultivar.
- Expect about two pounds of potatoes per plant, depending on variety and growing conditions.
In Garden Rows or Raised Beds
Plant seed potatoes about 3- to 6-inches deep and about 12- to 18-inches apart in rows that are about 24- to 30-inches apart. This plant grows large and this is an instance where the closer spacing helps ensure that the foliage from the plants will shade the soil, helping prevent extremes in soil temperatures.
After planting, form a hill by loosely mounding up dirt 4 to 6 inches over the area where you planted the potato. This will allow room for the tubers to form and grow in the soil. This helps prevent tubers from pushing through the soil, which increases the chance they will be exposed to the sun, called greening, which isn’t desirable.
Keep soil moisture levels even throughout the growing season. This helps prevent cracks and misshapen potatoes. As the foliage develops through the summer, the plant will need more water. Water at the base of the plant to keep the foliage dry. When temperatures are high, you may need to water more frequently to keep the moisture levels even.
Add a layer of mulch to help keep both moisture levels and soil temperatures even, and prevent weeds.
In Containers
Select containers or grow bags that are large, around 5- to 10-gallon capacity and about 2-feet tall.
Make sure the container has drainage holes and fill the container with potting mix blended with compost. University of New Hampshire Extension recommends using a half-and-half mixture of soilless potting mix and quality compost or rich organic matter. Do not use soil from in-ground gardens or raised beds as it compacts easily and may result in soil that will not drain properly. Potatoes do not grow well in compacted soil.
Position containers in full sun, at least 6- to 8-hours per day.
Place the seed potatoes in the container, spacing about 8 inches apart. The size of your container will dictate how many seed potatoes you can plant.
Cover seed potatoes with 6 inches of soil.
As potatoes grow, continue adding more soil, leaving about 4- to 6-inches of foliage exposed each time.
Keep the soil moist but not soggy, which can cause the tubers to rot. Don’t allow the soil to get too dry, either. When the top inch or two of soil feels dry, add water until it runs out of the drainage holes.
Expect about two pounds of potatoes per plant, depending on variety and growing conditions.
Fertilizing
- When foliage first appears, apply a soluble fertilizer, such as a 5-10-10 and apply according to label directions once every couple of weeks.
- Organic options to feed your plants include fish emulsion or bone meal.
Controlling Pests, Diseases, and Other Problems
- Blight disease causes yellowing and dying of the leaves. Telltale signs are brown spots and yellowing of the lower leaves. Other diseases can be various rots, and Fusarium, Verticillium, and bacterial wilts. Fungicide applications will likely be needed. Follow label directions. If growing organically, look for fungicides that have been approved for organic production.
- Potato scab disease causes scabby, rough skin on potatoes and is a signal that the soil pH needs to be adjusted.
- Insects such as potato beetles, flea beetles, and leafhoppers can be picked off the plants or by using a high-pressure stream of water with a garden hose early in the day. Organic insecticides and conventional insecticides are available at most garden centers. Follow the label directions.
Harvesting and Storing
“New” potatoes
For those who like what many refer to as “new” or baby potatoes that are typically available in early summer, the harvest time is slightly different from late potatoes. “New” potatoes are smaller, about 1 to 2 inches in size, and are harvested before they have grown large. They are harvested before the potato vines yellow and die back. Harvest when the soil is dry. Dig around the plant to find the smaller potatoes.
Mature or Late potatoes
Toward the end of the season, and as plants begin to yellow and leaves begin to die, cease watering plants. When it’s late in the season and closer to harvest, the tubers can rot from too much water. When the foliage has yellowed and most of the vines have died, about two to three weeks after the last watering, it’s time to harvest the potatoes.
- Harvest when the soil is dry.
- Use a spade fork and gently work to lift the soil about 4 to 6 inches beneath its surface. Your efforts will be rewarded when the soil falls away to reveal a “hill” of potatoes.
- Remove the tubers from the soil and allow them to dry slightly in the sun, just long enough to brush off most of the soil. Do not leave them in the sun too long.
- For potatoes grown in containers, simply dump the container onto a tarp and sift through the soil.
Storing
“New” potatoes typically need to be consumed in a few days after harvest.
Late potatoes that are harvested in the fall typically last longer. Store them in a cool, dry, dark room. Stored in a basement or garage that is 38 to 42 degrees F and with humidity will help them last for several months. When stored at higher temperatures they likely will begin to sprout.
“New” potatoes are smaller, about 1 to 2 inches in size, and are harvested before they have grown large. They are harvested before the potato vines yellow and die back.
Expert Tips
- Planting times vary, depending on your region. Check with your county Extension center or local garden center or nursery for best times and best varieties and cultivars for your location.
- When deciding on which type of potato to grow, select the variety that is suited to the cooking methods you prefer and to your region of the country. Another consideration is whether it is early, mid-season, or a late-maturing variety or one of the gourmet or specialty varieties. Consider trying more than one variety.
- Cultural conditions give your potatoes the best chance of success. Start with rich, fertile, loose soil in a sunny location, at least 6 to 8 hours per day. Plant certified seed potatoes. Keep soil evenly moist.
- The soil around your potato plants may benefit from a clean layer of straw or shredded leaf mulch.
Frequently asked questions
Why do my potatoes have green skins?
Green skins are typically caused by the sun hitting the potatoes. This can happen when the potatoes are not planted deeply enough, and the tubers push through the soil and are exposed to the sun. Cut off and discard the green part.
Should I wash my potatoes before storing?
It’s best to harvest potatoes when the soil is dry and then gently brush any remaining soil off of them. Washing the potatoes before storing can cause them to deteriorate more quickly. Make sure they are dry before placing into storage bins or containers.
My potatoes haven’t had long enough to mature but the foliage is already turning yellow on the lower leaves and is covered with brown spots; what is causing this?
It sounds like early blight. A fungicidal or organic treatment may be needed. Follow label directions.
