Guide to Raising Chickens
Whether chickens are already part of your life out here or you’re exploring adding chickens to your backyard or farm, you’ve come to the right place. This chicken care guide shares all the basics for how to raise chickens. Learn how to start your flock, care for and raise birds for eggs, meat or companionship.
Raising Chicks
Choosing to raise chicks requires a little pre-work. Get your important questions answered about your plans for your chickens to all the supplies needed for their arrival.
Research and planning. Deciding to raise chicks should start by exploring these questions: How many chickens are you allowed to have where you live? Do you have enough space? Who will care for and clean up after them? Why do you want to raise chickens? Answering these questions will help you determine if you are ready and how to proceed.
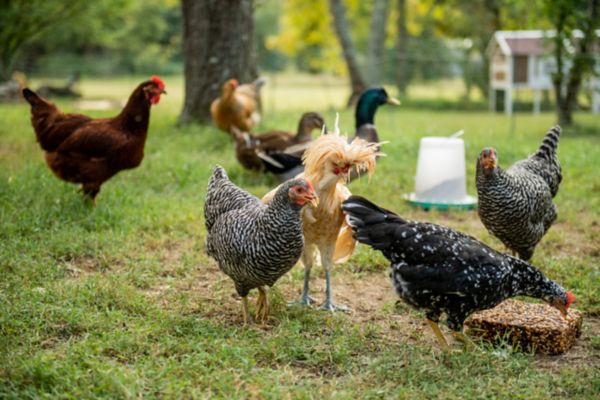
Choosing your breed and type. Once you start researching, the hundreds of breeds available can be overwhelming. To make life a little easier, try breaking it down first by purpose, then by needs then by temperment.
Buying chicks and preparing supplies. Once you've done your research, selected your breed and type based on your needs, you are ready to purchase your eggs, chicks, pullets, or chickens. If purchasing chicks, you will need supplies for the brooding period before they are ready to live in a coop (See Brooding Chickens for more.)
Ongoing chicken care: After about 8-12 weeks, your chicks are considered pullets, and at one year they are adult chickens. They will need you to: provide shelter, food, and water daily, offer access to exercise/outside time, collect eggs, clean the coop, and tend to nesting boxes weekly. You should also be prepared with a Chicken First Aid Kit to help care for sick or injured chickens.
For more tips on raising chickens and brooding chicks read our article How to Raise Chickens.
Tips for choosing chicken breeds
Purpose: Breeds fall into the following categories: heritage, egg laying, meat/table, and dual purpose. The Livestock Conservancy explains that heritage breeds “are the animals that you’d find on your great-grandparents farms,” or pure breeds of livestock and poultry historically present in the United States. Heritage chickens may be slower to grow, but when cared for and given ample outdoor space can live long, productive lives. Egg-laying, meat/table and dual-purpose breeds have been bred to produce large quantities of eggs, grow quickly for meat purposes or both.
Needs: The Chicken Chick defines 5 needs to consider when choosing your chicks, particularly for egg-laying: Climate, temperament, egg production, egg color and broodiness. A “broody” hen will prefer to sit, hatch, and raise chicks, so if egg production is your aim steer clear of these breeds.
Type: You can purchase hatching eggs, chicks, pullets or cockerels or adult chickens. Eggs will need an incubation set-up and aren’t ideal for beginners. Chicks are the most cost-effective. Pullets (females) and cockerels (males) are adolescent chickens that have already gone through the investment of brooding and are more expensive. Adult chickens are not always widely available and often need to be adopted from a rescue or farm sanctuary.
Raising chickens for...
Raising chickens for eggs
Learning to how to raise chickens for egg production can seem like an overwhelming task if you haven’t owned poultry before, but the process can be very rewarding. Start learning more about egg-producing breeds and chicken raising basics in our How-to Guide.
Raising chickens for meat
If you decide to raise chickens for meat production, you’ll have new breeds to consider, differences in raising, plus the added steps of slaughtering, processing or butchering.
Brooding Chickens
If you’re bringing home new chicks, you’ll be standing in for a mama hen for about 8-12 weeks until they reach adolescence. You'll need brooding supplies (and patience) for your new flock members before they’re ready to be introduced to any existing chickens and their new coop.
Basic needs for brooding chicks:
- Brooding box: You can use a cardboard or wooden box, but a plastic or galvanized metal tub will be easier to keep clean and is reusable if you plan to brood more chicks. It must be tall enough to keep chicks contained and near their heat source with room for food and water troughs.
- Bedding: You’ll want to have 2-3 inches of litter, typically pine shavings. If your brooding box has a plastic or metal floor, you may want to put down paper towels first to give the chicks better traction.
- Heat plate and lamp: Turn on lamps a day before the chicks arrive to warm things up. They will need about 24 hours of light per day the first week, which you can decrease to 12 to 13 hours as time goes on. If your chicks are huddling together, they’re too cold and if they’re spreading out away from the lamp, they are too warm.
- Feeder, food and water: You’ll need to get troughs for water and food to keep it from ending up everywhere. Plastic and metal feeders are easy to clean and come in a wide variety of styles. Introduce your chicks to their water by dipping their beaks as soon as you put them in the brooding box. Chicks will need medicated or unmedicated (if they were vaccinated for coccidia) starter feed for the first 5 weeks.
- Sanitizer/Cleaner: Thoroughly clean the area and brooding box before introducing the chicks. Water and food troughs should also be cleaned each time you refill them. Keep your hands clean before, during and after handling chicks and their feeders to avoid Salmonella contamination. Remove poop daily and change out litter often, especially if wet.
- Lid, cover or other security: Inside the home, it’s best to keep chicks in a separate room away from pets and family, for allergy reasons and to keep the chicks safe. Keeping chicks in a garage, outbuilding or other structure may be the best choice, if you can keep them warm. You can also use a lid or cover to keep out predators and other animals.
Learn more about how to make chickens with our helpful video and Chicken Brooding Guide.
When will my chicks be ready for outside and the coop
Introduction to outside: You can start giving your chicks short amounts of outside time around 4 weeks if temperatures are at least 70°F. Chicks should be supervised and provided with shade and access to food and water while outdoors. Use a dog crate or small chicken run as a chick play pen to keep predators away and keep chicks from escaping.
Introduction to the coop: Once your chicks reach 8-12 weeks old, they’re ready to graduate to the coop and be introduced to the rest of the flock! Be sure to supervise this process at first.
Introduction to nesting: Hens will be ready to lay eggs around 18 weeks. If you don’t have friendly older hens showing the new girls the ropes you can put a fake egg in the nesting box to help teach them where to lay.
Chicken life stages
Whether you raise your birds from eggs or adopt an adult chicken you are sure to experience the wonder of watching them grow, adapt, and interact with the flock. Learn about what to expect from each of the chicken life stages.
Egg: A hen will lay an egg every 1-3 days. Unless the hen has been fertilized by a rooster, the egg will remain unfertilized and unable to progress into an embryo. Once the hen has enough fertilized eggs she will become “broody” and sit on the eggs for 21 days, keeping them warm and protected.
Chick: After about 21 days the eggs will begin to hatch. The chicks have absorbed nutrients from the egg but will soon need to be provided with warm water, starter feed, and a brooder or brooding box with a heat lamp that you gradually turn down over about 5 weeks.
Pullet or Cockerel: By around 8 weeks chicks are out of their cute, fluffy stage. They’ll start to look a little awkward, considered adolescent pullets (females) or cockerels (males). They will begin to sort out their pecking order and can start to be introduced to adult chickens. They will soon have the shiny feathers of adult chickens. Pullets will lay their first eggs at around 18 weeks.
Adult Chicken: Adult hens will settle into a routine and learn to co-exist with each other. Young roosters will tend to challenge older males, so you may have to separate, rehome, or cull new roosters from your flock. Younger hens will not molt in their first year and will keep laying while your older hens slow egg production during molting.
Mature/Older Chicken: You will know that your chicken is in its golden years when it starts to move slower, take on an aged appearance and stops laying eggs on a regular schedule. Many chickens will live to 5-8 years or even longer if they are well-cared for, but most will stop laying eggs after year 2. Hybrid chickens, which are bred for high egg-output, will usually only live 2-3 years.
Housing Chickens
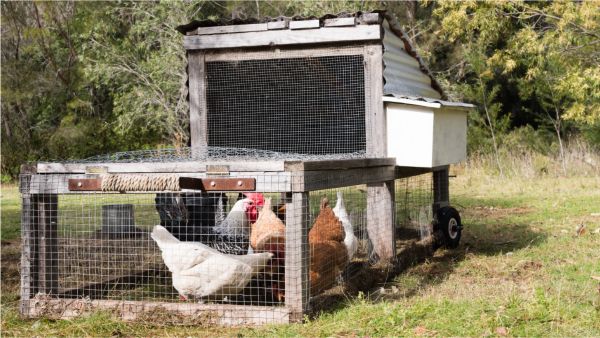
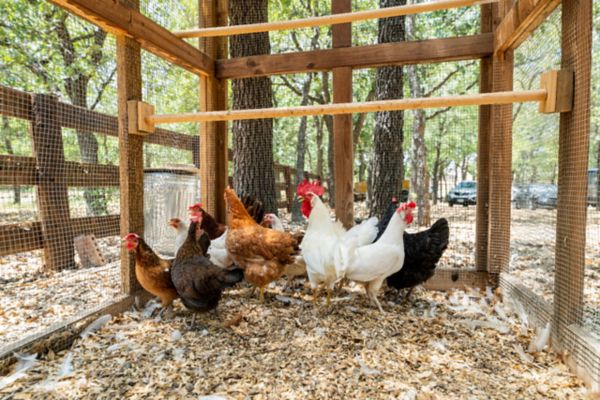
You will still need a safe, secure coop where they can roost and lay eggs out of the elements and away from predators. The coop itself can be an existing structure, homemade or custom-built structure, or a pre-built coop. Consider your budget, the space/location and flock size to determine the best coop for you.
Preparing a Coop 101:
- Good Ventilation: Coops need to have good ventilation to prevent the build-up of gas from chicken droppings, respiration and to regulate temperature. Be sure to cover vents with chicken wire to help keep predators out.
- Enough space: You’ll want to give your birds enough space to move freely in their coop, and have room for a roost/perching area, nesting boxes, light, food, and water. For example, 110 square feet is a minimum recommended size for 6 chickens (18-foot coop, 90-foot run). Keep in mind, if your coop is too large, your chickens won’t be able to generate enough body heat to keep it warm.
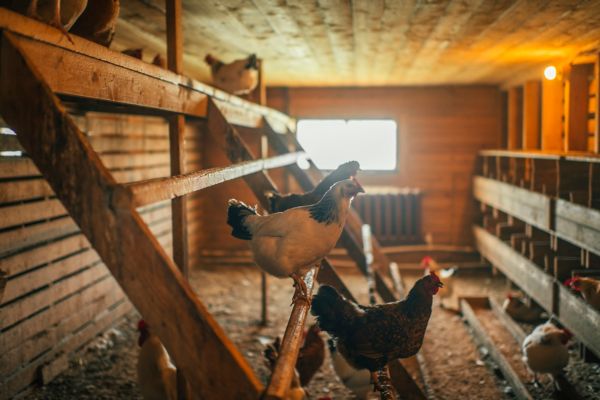
- Roost with perches: The roosting area is an elevated space (2 feet minimum) where your chickens will perch and sleep at night. Give your chickens about 6-10 inches each on the perch, although they will usually huddle together.
- Nesting boxes: Your hens will lay their eggs in nesting boxes, which can be a large box that they share or individual boxes to give them more privacy. Individual boxes, which many hens prefer, need to be a square foot of space per chicken.
- Roaming area/Run: You can create a run, a tractor (portable run) or allow your chickens to roam in a fenced area or yard. The benefits of a portable run are that it will give your chickens fresh areas to safely explore and make clean up easier. Chickens need at least 4-5 feet per chicken, but keep in mind, the more space they have the happier they will be.
- Secure from predators: Chickens predators include snakes, foxes and hawks. Determine what kind of predators are likely to be an issue in your area and put up defenses against them. These might include buried hardware mesh around or on the floor of your run, covering the run with chicken wire or tarp, removing any overgrowth to eliminate hiding places, checking for holes, and keeping ventilation high up and covered. Lastly, make sure to lock it up at night!
We have a wide variety of coop designs available to help inspire you and meet your needs.
For coop cleaning tips read How to Clean a Chicken Coop.
Feeding Chickens
Chickens are one of the easiest livestock to feed, but there is still a lot to learn to keep your flock healthy and productive. Get all the basics for feeding your chickens from food types to feeders.
- When and how much to feed: Chickens should be fed in the morning and evening. The average chicken will eat about a ½ cup of feed per day. Overweight chickens may need to be fed separately. Feeding small amounts throughout the day helps keep feed from going stale and losing nutritional value.
- Water: Chickens need clean, fresh water always. One quart of water per 4 chickens should be an adequate daily supply. Use a hanging poultry waterer or drinker (you may need multiple) to keep it off the ground and prevent contamination.
- Nutrients: Clean, shiny feathers and bright, clear eyes are great signs that your chickens are getting the nutrients they need. They should be getting a well-balanced mix of feed that is high in protein and low in carbohydrates plus fat, and vitamins A and E. Some nutrients can come through treats and their feed can also be supplemented if needed.
- Feeding mistakes: The biggest mistake chicken owners make is not feeding their flock enough or high enough percentage of protein. This will have the most impact on growth, health, and egg production. Other examples of feeding mistakes are too many treats, stale feed, switching feed mixes too often or too quickly and not keeping feed and water stations clean.
For a deep dive into feeding chickens, read our Guide to Feeding Chickens.
Tips on chicken feed, feeders and treats
Types of feed: There is a large variety of poultry feed available, but most include a mix of cracked corn, soybean meal, fishmeal, or meat and bone meal. Their dietary needs will shift with their life stage and the seasons. Some common chicken feed types are chicken starter feed for chicks, chicken layer feed (18% protein or higher), grower feed and organic feed.
Feeders: A few things to consider when choosing the right chicken feeder for you include easy set up and cleaning, prevents pests, waste and mess and is waterproof. Using a gravity feeder that can be hung up off the ground is a great wat to keep feed away from pests.
Treats: A great way to balance a chicken’s diet is with occasional, healthy treats such as mealworms, fruit and veggie table scraps and sunflower seeds or store-bought treats like chicken feed bites. Avoid potato peels, onion, garlic, dog or cat food and dairy products.
Chicken First Aid
The key to chicken care when a member of your flock is sick or hurt is being prepared with a few simple tasks and supplies.
- Observation: Be a good observer daily, so you can identify issues with your chickens as they arise. Since chickens can’t tell you exactly how they’re feeling you’ll need to look for more subtle signs they are unwell. You’ll also want to learn to identify common chicken pests such as flies, gnats, worms, lice, and mites.
- Sick bay: Have sick bay prepared to keep ill or injured chickens separate whether you use a pen, hutch, small coop, animal carrier or crate. Make sure it’s quiet, warm, and safe.
- First aid kit: Keep a chicken first aid kit stocked with essentials, such as gauze pads, disposable gloves, and ointment or wound spray, to name a few.
- Veterinarian or poultry expert: Have a poultry-trained veterinarian lined up, if possible, so you don’t need to scramble for help. Even if you don’t have direct access to a veterinarian, investigate state and federal resources and services for poultry such as a poultry specialist from the Department of Agriculture.
- Re-introduction: Plan for slow re-introductions to the rest of your flock once your bird is on the mend.
Get into the finer details of preparing to care for sick or injured chickens with our full Chicken First Aid Guide.
More information on common chicken issues
Stock your kit with Poultry First Aid.
What to Know About Molting Chickens
Molting is a natural process that all mature chickens go through up to twice a year. Your birds will lose their old, dull feathers so they can refresh their plumage ahead of changes in light and weather. It’s an important time to watch your flock closely since molting can make chickens more vulnerable to injury and disease.
Molting chicken quick facts:
- Types: Chickens can go through two types of molting; hard and soft, which is largely based on genetics. A soft molt is a natural process that happens over a few weeks and causes very little feather loss and exposed skin. A hard molt will cause your chicken to look almost bald with large patches of exposed skin.
- Timing: Molting happens in the fall (between the end of August and October) when the light begins to change, and the weather gets colder. A soft molt can also happen in the spring when the light changes again. Hens will start their first molt after one year. Every bird is different but molting typically takes between three and sixteen weeks. Younger chickens tend to molt faster, while older members of your flock will take their time. Fast molting hens are also the best layers.
- Process: Your chickens will start to molt at the head, before progressing to the breast and thighs and finally the tail. The molting process can be painful due to pin feathers, so handling your chickens less during this time is best.
For more advice and tips on supporting your flock during molting, read our Molting Chickens FAQ.
Feathers are mostly made of protein, so your chickens may need extra support during molting time.
- Expect lower egg production and some grumpy chickens
- Increase light
- Keep your chickens warm
- Watch for injuries to their skin from pecking
- Think about switching to a higher protein feed, or adding vitamins and minerals to their water
